


CuddleBug

Case Study
Follow my process!
Follow each step in my process of learning to create a fully rigged character model from concept to finish! This project was my first fully modeled and rigged character for a solo senior studio class at SCAD in 2024. I learned a lot of new skills from tackling this but more importantly I grew a deeper understanding of the foundational processes of 3D modeling.

For this assignment we were allowed to use our
own concept art or use concept art found online;
I chose the ladder. I chose the concept art titled
"Virtual Pet Singer" drawn by orisghost on tumblr.
I don't think I could have chosen a more perfect subject for my first fully rigged character. Doing a robot with mainly hard surface body parts allowed me to fully grasp the joint and hierarchy systems while still getting a taste of weight painting with her cord apendages.
Before I even opened maya I made a turn around
of the character to be able import and refence in engine. There were also parts of the character that I realized were inconstant or hidden in the concept art that I needed to design and plan for.
Concept


Block Out
The block out is quite simple and straight forward as the signers shape language is pretty geometric and cartoony. I was advised by my professor that making her hair cords straight by default would make rigging easier later on so in-between the next step I adjusted that. A major concept I learned for the block out is to keep in mind future details so you can set up the wireframe to support. I didn't do that for the head panel or legs so I ended up exporting them to zbrush to carve, and then reimport to retopologize. It is an extra step in the process but still beneficial to learn for future senarios.

Detail
Subdivide. Subdivide. Subdivide. The Virtual Pet Singer has a very sleek design so didn't have to do much outside beveling and soft selecting define features. The hardest parts to model are actually the most hidden. A detail I forget in the concept stage was how the skirt pieces attach. I ended up designing and redesigning functional hinges mid-project that would allow the skirt to move realistically.


Zbrush
Assistance
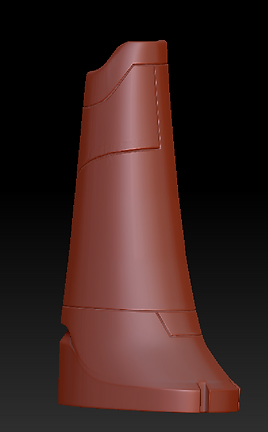
As I mentioned before I imported a few body parts to zbrush to literally carve details into the model. I didn't mind doing this as I was taking another class on digital sculpting. I'm also aware I could have just added these details via height maps but since I had a relatively easy model I wanted to go the extra step.


Texture
Texturing is not my strong suit so I'm always trying to improve with each project, this one included...however because of that I tend to over plan. My idea was to have an animated screen texture that would also allow me to animate her face as a 2d asset... I didn't get to do this lol. But! not even a year later I know what to do now; If I were to redo this I would make the screen animation and face switching feature with blueprints in unreal engine. I also was really scared of low resolution so my textures are very spread out. I definitely would pack tighter and more efficient UVs now!


Rigging
Learning to rig was relatively straight forward. I had to fiddle around a bit to figure out what segment the joint pieces should be fixed to and adding the extra joints skirt panels and ears was the same as arms and legs. The hair cords did give me trouble, they were too close together which caused them to influence each other in a really annoying web lol. I do know now that rather than adding more joints I should have subdivided the cords length.

Pose
Referencing the concept art I posed our girl with a fixed camera (so I don't lose the angle). I didn't have time to add controllers so posing was a little more tedious than it need to be but I got the job done!


